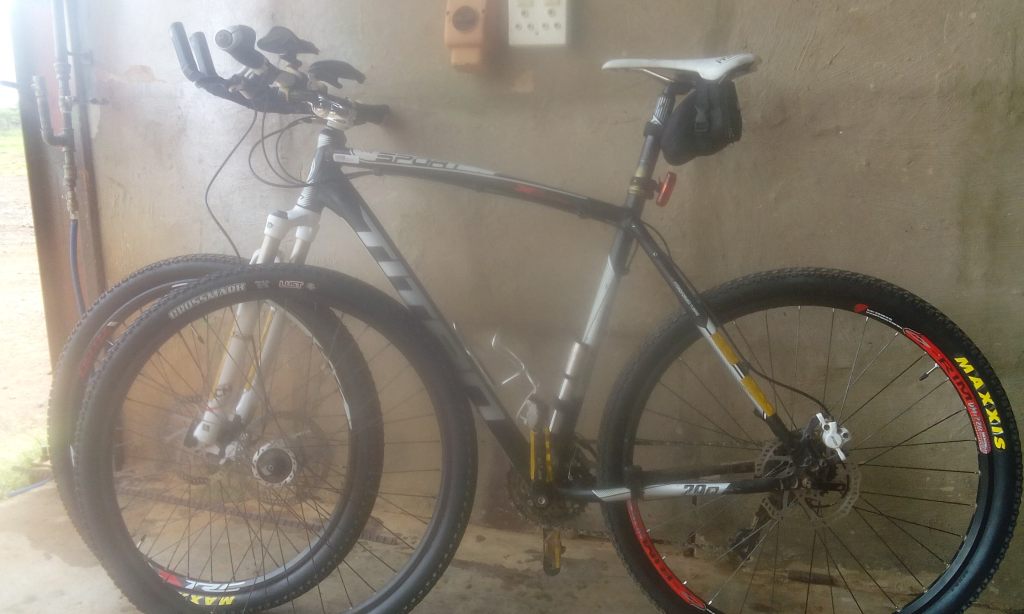
I haven’t talked much about the discomforts of a long ride. They’re part of the deal. Overcome them, and you get that feeling of having accomplished something real. But if the ride is pure pain, you won’t want to do it again. That’s why cyclists like me are always fine-tuning the bike: tire size and pressure to cushion the ride, saddle height, the distance to the handlebars, and the height of the bars relative to the saddle. It all comes down to how much weight sits on your hands versus how much sits on your behind.
When I rode the Transafrica race, twice, the hours in the saddle added up fast. I was lucky. I never developed saddle sores. A lot of that comes down to getting the fit right, so let’s get into the details.
1. The Saddle
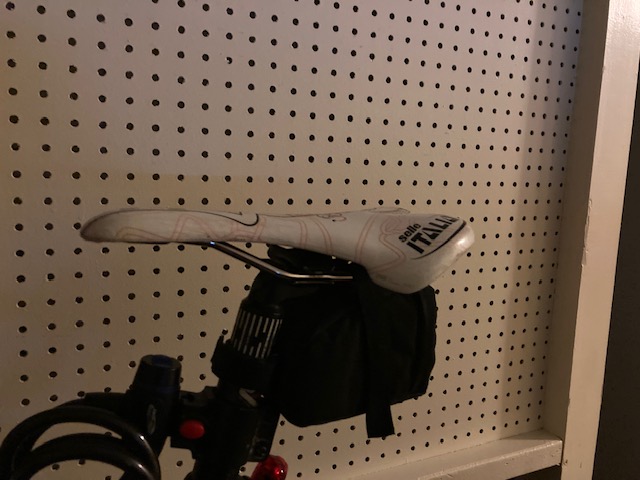
Saddle choice is personal to each cyclist, and for us it’s not about chasing the speed of a road racer. Once you have chosen your saddle it needs to be set to make you comfortable for long distances.
The more you lean forward, the less wind resistance your body creates. But it also means lifting your head further to see the road, which can bring on neck and back pain. The upside is less weight on the saddle and less pressure on your behind, which lowers the risk of saddle sores.
The more upright you sit, the more comfortable you feel, and the longer you can stay in the saddle each day. But more upright also means more weight goes onto your behind, and that raises the risk of saddle sores.
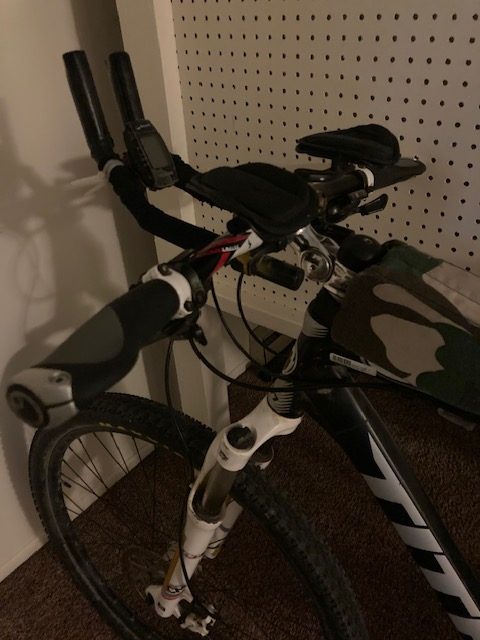
Once you’ve found the right balance between your hands and your behind, it’s time to think about handlebars that offer different hand positions. I run flat bars and tri-bars. I’ve thought about trying drop bars, but I’ve never gotten around to it. I like the wider flat bars for gravel roads. The tri-bars let me drop down out of the wind when it’s coming at me from the front, or give me more power without having to shift gears. I just drop down and leave the gearing where it is.
Getting the Fit Right
To sort all this out, some people go to a professional bike fitter. Most of the time, they’ll get you into the right position, and from there you make small adjustments based on the distance you’re covering, the road surface, and the weight of the bike.
In my case, I’ve done the measurements myself to get into the right ballpark, then made small adjustments from there: There are videos on YouTube that show you how to measure and calculate the distance from bottom bracket to saddle.
- Saddle forward or back, to get the bottom bracket more underneath me for power, and to find a more upright position
- Leveled the saddle, which let me move around more during the day
- A height-adjustable handlebar riser. The older I get, the more upright I sit. Every few years I raise it a little as my back gets stiffer, and it’s made a real difference.
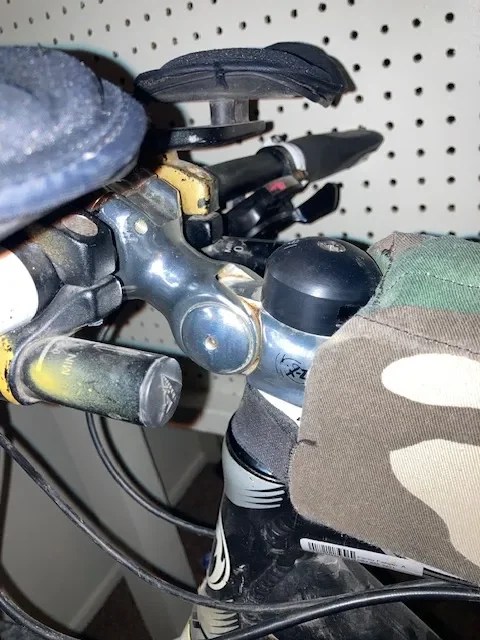
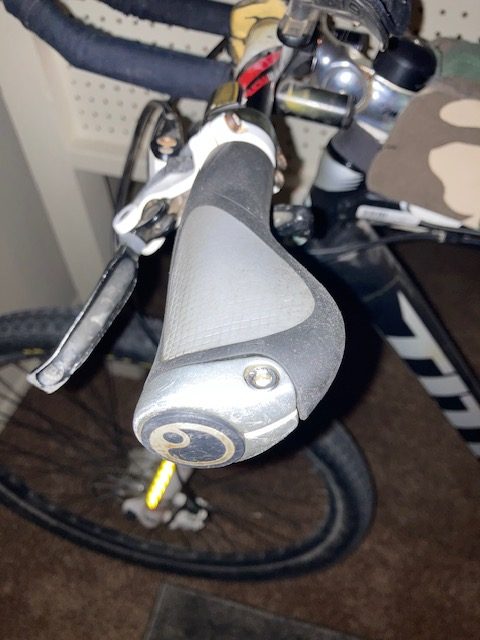
I used to run bar ends for extra hand positions, but I found they actually limited me. Without them, I can rotate my hands freely around the end of the bars. I also installed grips with a wing shape, which increases the contact area on the palm and reduces pressure on any one small spot of the hand. I wear a cycling glove with a gel pad to take the vibrations
2. The Pedals
If you ride flat pedals, your leg and calf find their natural angle without you even thinking about it. It just happens by instinct.
Cleats are a different story. It becomes more of a science. I chose cleats for two reasons. First, on a bumpy road your foot won’t slide off the pedal. Second, when you’re tired and the muscles start to ache, you can pull up on the pedal stroke and shift the work to a different muscle group, giving the tired ones a rest. I find I get more power for less effort over distance.
Along with those benefits come some risks: falling over, sore knees, and muscle aches. A few millimeters of cleat position, left, right, forward, or back, can make a big difference. I’ve tweaked mine over the years and found a good spot. My only worry is that the day I replace my shoes, the tuning starts all over again.
Interestingly, my legs aren’t the same. One leg likes to twist, the other moves more like a piston. So each leg gets tuned on its own.
3. Personal Hygiene
With all this talk of fit, I must never forget to emphasize the need for personal hygiene. The sweat from your body creates small crystals, and down in the tender parts, those crystals start acting like sandpaper. For multi-day rides, it’s a good idea to carry a change of clothing and allow yourself time to wash. That washes out the crystals and keeps the bacteria that multiply down there from building up.
On my first Transafrica, I washed my cycling bibs, but I still started to feel sensitive. Then one night, just before falling into bed, I put on an iodine cream. It killed off the bacteria and cleaned out any spots before they could get infected. It was a game changer the next day. I had been using chamois cream, but on a multi-day race, that alone wasn’t enough.
The following year, I switched it up. I used a disinfectant bath soap every night and washed my bib with it too. That stopped any trouble from down there completely.
On some overnight stealth camping trips, where a proper shower wasn’t an option, I’ve used wet wipes to keep on top of personal hygiene. It worked well, and I’d recommend it to anyone who doesn’t have the privilege of a good clean-up once a day.
Seeing It From the Outside
I once had my family film me riding past so I could actually see what my position looked like from the outside. I’ll post the video below.
Bike fit is never really finished. It shifts with age, with distance, with the road surface, and even with a new pair of shoes. The goal isn’t a perfect position, it’s a comfortable one you can hold for thousands of miles.
What’s your biggest fit struggle been? Saddle, bars, or pedals? Let me know in the comments. Share an experience, I am sure some readers would like to hear.